How to Sharpen a Pocket Knife without a Stone? And 10 Other Methods
A pocket knife is an essential tool to have around the home and even more so when you are about to spend plenty of time outdoors. However, it’s not enough to just have a pocket knife with you.
That pocket knife you’re taking outdoors has to be in peak working condition, which means that it has to be as sharp as it can possibly be.
The good news for you is that sharpening a knife is a relatively straightforward process. You don’t even need a sharpening stone to do that.
So, lets discuss, How to Sharpen a Pocket Knife without a Stone?
Reach for the Knife Sharpener
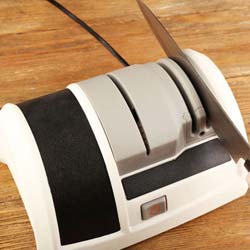
If you want the sharpening process to be as easy as it can possibly be, then go ahead and grab the appropriately named item known as the knife sharpener. Electric knife sharpeners are available, but I wouldn’t say they are necessary. A manual knife sharpener is more than suitable for the job.
Manual knife sharpeners typically have more than one sharpening slot and you will see that they are labeled according to their level of coarseness.
What you want to do is to put the knife in the coarsest sharpening slot first. Hold the knife in the same manner as you would when you’re chopping something.
Start from the tip of the knife and pull it horizontally towards you while making sure that the blade remains in contact with the sharpener. Repeat this step about five to six times.
Move to a finer sharpening slot next and repeat the steps again.
Once you feel that your knife is suitably sharp, you can rinse the knife under some running water, wipe it down, and then store it until the next time you need it.
How to Sharpen a Pocket Knife without a Stone?
If you just so happen to be in the middle of remodeling your home, there’s a chance that you may have some spare slate tiles lying around. As it turns out, those pieces of slate are excellent options to use for the purposes of sharpening your knife.
Just wash those slate tiles thoroughly and they should be good to go.
The Process
We’re operating under the assumption that you’ve already cleaned the slate tiles, so you can now proceed to prepping them for the sharpening process. To do so, you just need to treat that piece of slate like a whetstone. That means lubricating it properly and you can do that by soaking the slate tile in some water.
Take your knife next and position it at a 10-degree angle again. Run the knife along the length of the slate and make sure to sharpen all the parts of the blade. After sharpening one side, flip the knife and work on the other edge.
Keep this going until the knife has been sharpened to a sufficient degree and then just wash it before you store it again.
The Other Items You Can Use to Sharpen Your Knife
1. Another Use for the Coffee Mug
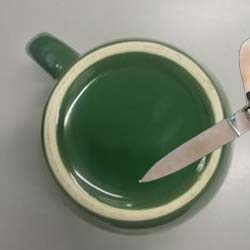
In a pinch, one of the household items you can use to sharpen your knife is a coffee mug.
You may be wondering exactly how your favorite mug can be capable of acting as a knife sharpener. For the answer to that question, you just have to check underneath. That rough surface typically found at the bottom of most coffee mugs is what you can use for sharpening the knife.
Not all coffee mugs have that rough surface, but if you happen to have an older one stored in your cupboard, then you’re in luck.
The Process
Go to your cupboard and check if any of your mugs there has that rough surface underneath.
If you can find a mug with a rough surface underneath, go ahead and set that upside down on any stable surface. The rough surface should be facing up.
Pick up your knife next and angle it next to the coffee mug. The knife should be positioned at about a 10-degree angle. With the knife now in proper position, proceed to run it against the surface of the mug. Run through the length of the blade going from the tip to the base.
Once you’re satisfied with the sharpness of the knife, flip it over and work the other side.
Continue doing this until both sides of the knife reach your desired level of sharpness. Don’t forget to work both sides of the blade the same amount if you want the best results.
Rinse the knife afterwards.
2. Nail Files are Effective Knife Sharpeners
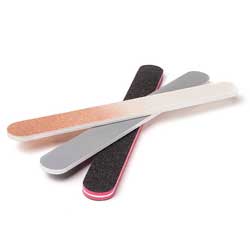
Keeping your fingernails nicely trimmed and neat is just an example of good hygiene, but as it turns out, your desire to do that may also prove useful to you when you need a knife sharpened.
Nail files are commonly used for maintaining fingernails and they just so happen to also be helpful tools for improving the edge of your knife.
Once again, it is the rough surface provided by the nail file that will be helpful to you when you need a knife sharpened.
Now, it’s time to learn more about how this household item can be used for honing the blade of your trusty pocket knife.
The Process
Because it’s so handy, you may instinctively think to hold the nail file in your hand while sharpening the knife. However, you must avoid that at all costs unless you want to put yourself at significant risk for injury. Instead, just lay the nail file down on any solid surface and even place some cloth underneath it to keep it in place.
With the nail file secured, grab your knife and set it at a 10-degree angle again. Gently strike the nail file with it, but remember to move the edge of the knife away from you. Work your way down from the tip of the knife down to the base. You can try holding on the handle of the nail file if it’s long enough to further reduce the chances that it slips.
Repeat the same sharpening process, but work the other side of the knife this time.
Check the edges to see if you’re satisfied with how sharp they are. Rinse the knife once you’re done.
3. A Second Knife can Help You
You’ve probably heard something along the lines of knives being ineffective tools for sharpening other knives. Honestly, I bought into that idea for a long time as well because it just seemed like all you would accomplish is to damage two knives instead of sharpening one.
As it turns out though, knives can absolutely be used to sharpen other knives. It’s just a matter of knowing which part of the second knife should be used for sharpening process.
If you stick to using the back of one knife to sharpen the edge of another, trust me, you’re going to be happy with the outcome.
The best part is that sharpening a knife using another knife isn’t even that hard to do.
The First Method
First off, you should pick up the knife that you will be using as a sharpener in your dominant hand. The reason why is because you want that knife to be stable and it’s easier to do that when your dominant hand is holding it.
Next, pick up the knife you want to sharpen in your other hand. Alter the positioning of both knives so that they are facing in the direction of your dominant hand. Tweak the positioning of the sharpening knife to get it at a 10-degree angle.
Strike the back of the sharpening knife with the one in your non-dominant hand. Run through the edge of the knife from the tip to the end.
Flip the knife you’re sharpening and work on the other side. Continue doing this until the edges are suitably sharp and remember to rinse before you store the knives away.
The Second Method
Pick up the knife that you will use as the sharpener with your non-dominant hand. Position the knife in a way that the blade is facing straight down. Because of the positioning of the sharpening knife, it’s easier to hold in place and that frees up your dominant hand.
Use that dominant hand of yours now to pick up the other knife and then position it a 10-degree angle relative to the back of the sharpening knife. Strike the back of the sharpening knife with the one in your dominant hand and remember again to work from the tip to the base.
Turn the knife you’re sharpening over and work the other edge. Keep this process up until you are happy with the sharpness of the knife and then rinse it before storing it.
4. Car Windows Equal Knife Sharpeners
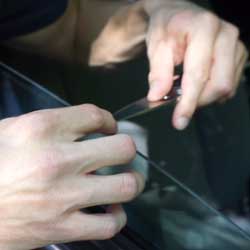
You’re probably not roughing it with your car in tow, but if you do somehow find yourself in a situation where you need a knife sharpened in a hurry, the window of your car can be helpful.
One scenario in which the next method to be detailed may be helpful is when you’re trying to fix something on your car, but your knife isn’t sharp enough to get the job done.
Now, it is worth noting here that not all car windows can be used for the purpose of sharpening a knife. However, if the edge of your car window is on the rough side, then you can go ahead and try out this method.
The Process
Assuming that you’ve already checked and that your car window does indeed have a rough edge useful for sharpening a knife, you can roll it halfway down or up depending on its initial position.
Grab your knife next and once again, set it at a 10-degree angle next to the exposed edge of the car window. Move your knife along the rough edge of the window, making sure to get every bit of the blade.
If your window is sloped towards a certain direction, move your knife in that same direction so that it will either fall into the car or to the ground if it slips out of your hand.
Turn the knife over to work on the other edge and keep the sharpening up until you feel that the knife is suitable to be used again.
5. Handled with Care, Broken Glass Can Sharpen Your Knife
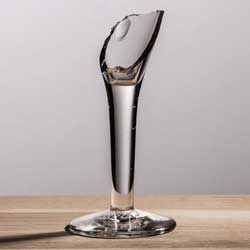
Let’s say you’re walking through a forest searching for something that can be used to sharpen your dull pocket knife and the only noteworthy things you’re stumbling across are discarded bottles, does that mean that you are stuck with your dull knife?
I’m not advising you to break some glass bottles here, but in a pinch, the rough edge of broken glass can be an effective knife sharpener.
Using broken glass to sharpen your knife is obviously a bit risky, but it can work as long as you are careful and attentive.
If you’re thinking about using a spare glass bottle at home, you can make the sharpening process easier by first slicing the bottle down to size using a glass cutter.
The Process
Since we’re using broken glass here, I would advise you to first put on your thickest pair of gloves just to make sure that no shards wound you.
Hold the broken glass in one hand and the knife you want to sharpen in the other. By now, you should know that the knife has to be angled at 10 degrees relative to the sharpening surface.
Go ahead and start moving the edge of the knife across the broken glass. Repeat this motion as carefully and slowly as you need to in order to avoid any accidents.
Once again, you need to repeat the sharpening process for the other edge of the knife.
After you’re done sharpening, clean the knife thoroughly to get rid of any debris.
6. Sandpaper Sharpeners Are Worth Trying
Throughout this article, we’ve talked about how effective rough surfaces can be for the purposes of sharpening knives. With that in mind, it should come as no surprise that sandpaper can be effectively used as a knife sharpener.
The sandpaper may even be the best alternative to the whetstone.
The Process
The tricky part about using sandpaper to sharpen your knife is that it obviously lacks height. You can’t just lay it down on a countertop and run your knife on it because you may exceed the coverage and end up damaging your knife.
To prevent that from happening, you can place a sheet of sandpaper over a wooden block or any kind of solid object that is stable and has some decent height. If you want to make sure that the sandpaper does not move around while you’re using it, you can even glue or staple it to the solid object.
With the sandpaper elevated, position your knife at that familiar angle and then proceed to move it along the rough surface. The sharpening process should be a bit quicker this time around thanks to how rough the sandpaper is.
Don’t forget to work over the other side of the blade and to clean the whole knife before storing it again.
7. Build Up the Edge of Your Knife with a Brick
The bricks that are usually used for building houses are also suitable for sharpening your knife, or at least most of them are. The potential issue with using a brick as a makeshift whetstone is that it can be too rough, to the point that it may damage your knife rather than sharpen it.
Avoid that issue by finding a brick that does not feel exactly like a stone when you run your hands across it.
The Process
With the correct brick now in hand, you can proceed to the knife sharpening process.
To get the best results from your sharpening brick, you should treat it as you would a conventional whetstone. If you have time to spare, soak the brick in some water before using it. You should also lubricate it just before you start sharpening your knife.
With the brick properly prepped, set your knife in the aforementioned proper angle again and then use it to strike the brick. Complete nice, long strokes that touch all parts of the knife’s edge. Finish one edge and then work on the other side.
Wash the knife thoroughly after sharpening to get rid of any foreign materials.
8. A Shovel Sharpener Is Surprisingly Effective
We’ve talked about using some pretty unconventional tools for sharpening knives in this article already, but the most unconventional of the bunch may be the shovel.
When you take the time to think about it though, the blade of the shovel is just another tough object with a rough surface, so obviously, it can be used for sharpening your knife.
If you have multiple shovels to choose from, pick the one made out of the strongest material as that will deliver the best results.
The Process
Begin by sticking the pointed edge of the shovel you have picked out into the ground, but avoid completely submerging it. Just bury it deep enough so that it can hold steady.
Now that the shovel in the right position, bend down and take out your pocket knife. Position your pocket knife along the thick edge of the shovel – the part you usually hit with your feet when you’re digging into the ground.
With the knife angled correctly, stroke it along the edge of the shovel. Do that again for the other side of the knife and keep going until you achieve the level of sharpness you want.
Remember to wash the knife after you’re done.
9. Leather Belts Are Great for Knife Maintenance
Unlike the previous entries in this article, the leather belt is not necessarily useful for the purposes of sharpening your knife. Instead, it can help you out by maintaining the edge of your already sharp knife.
To be more specific, the leather belt can be used to remove the burrs that are usually formed over the course of sharpening the knife.
It would help if you use a leather belt with a rougher texture for maintaining the sharpness of your knife, but even one that is somewhat on the smooth side will suffice.
The Process
Similar to the sandpaper, you can’t just lay the leather belt down on a countertop and get to work right away because your knife may hit a surface it’s not supposed to.
To avoid this issue, take the buckle of the belt and then hang it from a higher nail or hook. Now, you can move your knife along the leather belt without worrying that it will touch a surface that may damage it.
From here, you know what to do. Angle the knife, run it along the leather belt, and work over both sides until the burrs are removed.
10. Cardboard Can also Be Used for Knife Maintenance
If your knife is already at its ideal sharpness level and all you want to do is maintain it, even a simple piece of cardboard will be able to help you. The rough edges of cardboard are what you’ll need for maintaining the edge of your knife.
There’s really no reason for you to keep using dull pocket knives given how many items in and around your home as well as outdoors can be used to sharpen them. As long as you are careful and follow the steps properly, your pocket knives will remain ready for work even if they have not seen a whetstone anytime recently.

