Process Steam Cleaning Tile Floors And Grout Also Hardwood Floors
Tiled floors and hardwood floors can be the pride and joy of any home. They look classy and amazing when properly maintained. But adequate maintenance can be a significant concern, as these floors are very vulnerable. Check out this handy guide to learn all about keeping your tiled floors and hardwood surfaces sparkling clean.

Steam Cleaning Tile Floors And Grout – 12 Step by step process
Tiles look beautiful. But they also need regular care and maintenance to keep looking awesome and new. Professional cleaning is an option, but an expensive one.
If you are willing to get your hands dirty, you can get the job done on your own, with minimum expenses. Check out the following steps.
1. Understanding The Cause:
Grout tends to get very dirty. Learn how and why, and you can be prepared to solve it in the right way. In bathrooms, grout is vulnerable to soap, mold, and mildew.
In kitchens, m, mildew is the main culprit, along with footfalls and food stains. Gentle acidic cleaners are the first line of defense against both. Harsh chemicals should only be used as a last resort.
2. Household Cleaning Option:
When the stains are not too persistent, this approach is often more than enough. Common stains are often the result of spillage of everyday liquids and materials. This option is called household cleaning as it uses components that are easily available in most households.
3. Remove All Floor Rugs And Mats
This is, of course, the starting point. You cannot clean the tiles or grout while there is stuff covering those up! Pick up all such floor coverings, and leave them outside.
If possible, give them a good shake to clean them off the dust and dirt. Leave them on a clean surface if possible.
4. Sweep And Vacuum:
Start with a broom. These will get into all the crevices and nooks with minimum effort. Divide the floor into sections. Create a pile of debris in each section for easy removal.
Get the vacuum ready by moving it to the “bare-floor” setting. Use the vacuum on the piles of dust first. After that, scan the entire floor as a final step.
5. Make A Paste Of Baking Soda And Water In 3:1 Ratio
Make a household cleaning mix from a combination of baking soda paste and white vinegar. Apply the paste to the grout lines. Create spray mixture of vinegar and water in the ratio of 1:1. Spray this solution on to the baking soda mixture in the grout lines.
This will result in some bubbles. This is the sign of the chemicals working. Wait for the bubbling to stop, which should take a few minutes. Use a nylon toothbrush to scrub along the grout line.
After that, use a mop and plain water to clean all the stuff. Change the water often to ensure that all the vinegar and baking soda is removed from the floor. Do not use this method on marble surfaces.
6. Generic Or Commercial Grout And Tile Cleaning Products
If the above step does not work, then it is time to bring in the heavy hitters. Commercial cleaning are easily available at your local supermarket.
To use them follow these steps:
- Apply the cleaner to the tiles and grout
- Wait for a few minutes
- Scrub using toothbrush
- Mop the floor with water
7. Heavy Duty Cleaning Products
The nastiest stains cannot be dealt with effectively using the above two methods. If that is the case, oxygen bleach and hydrogen peroxide are the nuclear button options. These are heavy oxidizers that need to be diluted for safety.
They require extra care. Try applying a sample solution in a small area to ensure that they are safe for your tiles.
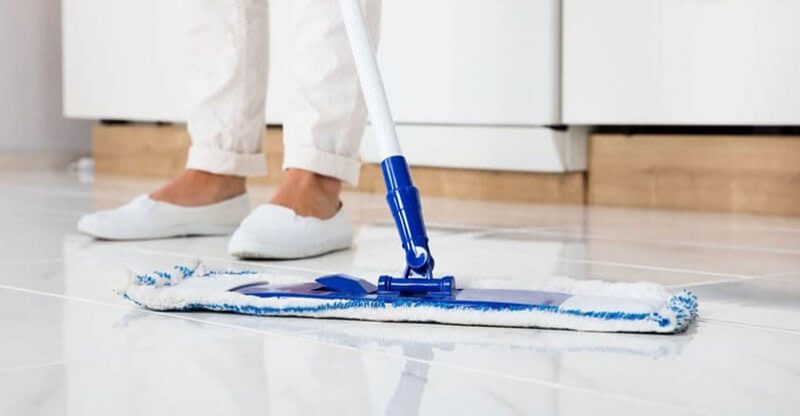
8. Mop The Floors
For best results, use a chamois mop. Dip it in the cleaning solution or water, and remove excess water by wringing them. Change the water often once you start moping.
Stains should be dealt with using the soft brush. Use warm water to avoid soap buildup after cleaning. After moping, you can use air dry method, or use some soft cloth.
9. Return Rugs And Mats
Mats and rugs offer extra shielding for your tiles against dust and dirt accumulation. They can help reduce the time you spend sweeping, cleaning, and vacuuming. Use them at strategic locations in your home, like the main doorway, and other entry points. Kitchens and bathrooms also need separate mats.
10. Professional Steam Cleaning
This is not the best option for budget-conscious households. Expert services do cost extra money. But for some households, this can be a very economical solution.
And there is no denying the fact that you will get the best possible results here. You can also try to get your hands on a steam cleaner and go the DIY route. Steam cleaners preserve the color and structural integrity of the grout.
Here are the steps to using a steam cleaner:
- Assemble the cleaner using user manual instructions
- Add clean water to the reservoir
- Plug the device and allow it to create steam
- Point the brush end to the floor and move it to and fro
- Mop the floor once the entire surface has been given the steam cleaning.
11. Other Tips For Keeping Tile Floors Clean
- If possible, try to enforce a no-shoes policy inside your home
- You can speed up the cleaning process further by using a dust mop in the intervals
- Identify the most heavily trafficked areas in your home and focus extra attention there
- Do not allow spills to linger, deal with them as soon as they happen
- Protect your floor tiles by performing tile resealing at prompt intervals
12. How To Vacuum Hardwood Floor
You can use hardwood cleaners to wet-clean such surfaces. These should ideally be used at regular intervals, at least once every two months. Spray the solution in small areas, and deal with the entire floor one section at a time.
Use soft socks or other materials to buff any scuffs that you notice. For heavier scuffs, damp cloth and baking soda is a good choice. Clean the baking soda using a damp paper towel. If the floor looks worn, it might be time to call an expert for a refinish.
3 Common Hardwood Floor Mistakes

1. Wearing your shoes at home
Tracked-in dirt is a mortal enemy of hardwood floors. Wearing shoes inside the home can bring these into the wooden surface, wreaking havoc. Dirt is abrasive and can leave scratches on the wood surface.
Ensure that everyone takes off their shoes before stepping onto the hardwood floor inside your home.
2. Not Vacuuming Often Enough
A vacuum is your wooden floors best friend. It can remove all those nasty sharp dirt particles with ease. Just make sure that you turn off the rotating brush if you are using an upright vacuum.
Often, canister types are the best for hardwood floors. They have a nice oval floor brush attachment that works wonders for this type of floor.
3. Waiting Too Long To Clean Up Spills
Spills are unavoidable. But leaving them in place can cause a lot of damage. They will make the floor dull once they dry out.
And in between, they also attract extra dirt and dust. Blot them ASAP using absorbent cloth or tissue. Use a damp cloth as a follow-up and then buff dry.
What Kind Of Vacuum To Use:
As we already mentioned, canister vacuums are the ideal choice for hardwood floors. These floors can have a lot of crevices and cracks.
The oval brush is perfect for reaching into such areas and sucking out dirt. The upright model is not safe, because of the rotating brush that can cause scratches on the wood surface.
Special Features Of Hardwood Floor Vacuums
If you want, you can even find special vacuums designed for hardwood floor surfaces. These models have features that ensure that they don't cause any damage to hardwood floors. Suction control settings allow you to customise the cleaning action of the vacuum on a wooden floor.
Height adjustment is another feature that can be very useful on these surfaces. Look for vacuums with soft rubber wheels for extra protection.
Other Factors To Be Kept In Mind
Hardwood floors need superior cleaning action to remove even the tiniest speck of dust. So when looking for a vacuum for such floors, look at modern models with cyclonic action. These vacuums have improved suction to remove all dust. Cost is also another factor.
You will have to pay a premium for improved performance, but try to avoid exorbitantly priced options. Noise is another factor where you may have to make some compromises. Stronger suction means greater noise. Also look for models with larger dust collection bags.
Tips On How To Vacuum Hardwood Floors
First Tip
The corner areas of the room are the dustiest and dirty areas in general. So always try to clean the corners before moving onto the more central areas.
If you start from the middle, the dust will end up accumulating more in the corners, making it harder to remove it all. This can be avoided if you clean the corners first.
Second Tip
Wood and dust have a very strong affinity. The best option is to avoid dusty objects in your rooms in the first place. Shoes are often the major culprits.
Place a shoe hanger at the entrance to make it easier for people to leave their shoes outside. The amount of dust in your rooms is guaranteed to be reduced with this single step.
Third Tip
You need to have a regular vacuuming schedule for your hardwood floors. There is no going around this requirement. Regular floor surfaces do not need such frequent cleaning.
But hardwood floors are different. Try cleaning them at least once every three days. You can maintain a clean and shiny look with this extra effort.
The Last Tip
Don't forget to combine wet mopping with your dry dusting routine at times. When you vacuum a hardwood floor, the dust can often swirl around. Using a wet mop ensures that the dust settles down before you vacuum the place. Do this one day before your vacuum day to get amazing results.
Use Care When Vacuuming Hardwood Floors
Hardwood floors are veritable dust magnets. These zones can have anything from dust to pollen to pet dander. Using a broom can result in sneezing and allergies. Using vacuum clearer with an advanced HEPA filter is the best solution. But even then, you need to employ extra care and caution.
Vacuum Beater Bars Are The Enemy
Beater bars are also called bristle bars. These are the rotating brush at the bottom of your vacuum cleaner. They work exceedingly well on carpeted floors, by digging into the fabrics and fluffing them up.
But they are the mortal enemies of hardwood surfaces. Their rotating action can severely wear down the finish on the wood surface. Your floor will be duller and full of scratches.
Ban The Bar
Obviously, if you want to vacuum a hardwood floor, pick a model that does not have the beater bar. Lighter vacuums often don't have this feature.
Or else, you should look for a vacuum cleaner that has the option to disengage this brush. And if you pick those machines, always remember to disengage before using on the floor!
Vacuum With TLC
If buying a vacuum without wheels, check the underside of the device carefully. If it does not have extra padding in areas that come in contact with the floor surface, do not buy it.
When choosing devices with wheels, look for models with rubber wheels. Avoid hard plastic wheels as they can scratch the floor surface.
Due diligence some tender loving care is all that you need to protect and preserve your hardwood and tiled surfaces. Follow these guidelines to get the best results. We hope you find something of value in this article. Let us know your suggestions or queries in the comments section below.
Thanks for visiting!


